![]()
Diferencia entre revisiones de «Greater Patagonian Trail»
(→Wild Animals) |
(→Traditional Food) |
||
| Línea 1189: | Línea 1189: | ||
[[Archivo:Piniones4.jpg|thumb|350px|right|Greater Patagonian Trail Section 6: Eating piñones. Image: Jan Dudeck]] | [[Archivo:Piniones4.jpg|thumb|350px|right|Greater Patagonian Trail Section 6: Eating piñones. Image: Jan Dudeck]] | ||
[[Archivo:Tortilla_de_Rescoldo.jpg|thumb|350px|left|Tortilla de Rescoldo. Image: Jan Dudeck]] | [[Archivo:Tortilla_de_Rescoldo.jpg|thumb|350px|left|Tortilla de Rescoldo. Image: Jan Dudeck]] | ||
| − | [[Archivo:Sopapilla.jpg|thumb|350px|left|Making | + | [[Archivo:Sopapilla.jpg|thumb|350px|left|Making Sopaipillas. Image: Jan Dudeck]] |
[[Archivo:GPT14-MakingBreadAndPizza.jpg|thumb|350px|left|Our way of baking fresh bread and pizza. Image: Jan Dudeck]] | [[Archivo:GPT14-MakingBreadAndPizza.jpg|thumb|350px|left|Our way of baking fresh bread and pizza. Image: Jan Dudeck]] | ||
[[Archivo:Cordero_al_Palo.jpg|thumb|300px|right|Cordero al Palo. Image: Jan Dudeck]] | [[Archivo:Cordero_al_Palo.jpg|thumb|300px|right|Cordero al Palo. Image: Jan Dudeck]] | ||
Revisión del 09:50 10 ago 2015
Summary

The Greater Patagonian Trail is a long distance trail that leads you right through the heart of the legendary Patagonian Andes. It's a stunningly beautiful and diverse trail that crosses volcanic fields, idyllic Andean valleys, snow covered mountain ranges, lush green forests and deep blue lakes and rivers.
On this 1500 km long trail you will meet herdsmen with their animals, indigenous Pehuenche on their homeland and courageous settlers that ventured into a challenging backcountry.
The Greater Patagonian Trail is not an official trail that was planned and set up by a government agency. It’s better: it’s a compilation of the most beautiful and diverse trails, neglected minor roads and cross country sections through the Patagonian Andes selected by a passionate hiker.
In several parts the trail branches into different routes giving you various choises. You may walk the entire trail or you can take a packraft with you to paddle over pristine mountain lakes and to float down on calm meandering rivers. You can also opt to climb up to the summits of several of the landmark volcanos on the trail. And if the regular route is not challanging enough for you than you can venture in some parts through even more remote backcountry.
Without any doubt substantially longer and more demanding hikes have been done on this continent. In the chapter Other notable Long Distance Trails and Hikes some remarkable adventures and epic hikes in this region are briefly described. The objective of this trail is not to top any of these archievements but to provide a well-documented and well-walkable trail for experienced and self-reliant hikers. To the knowledge of the author the Greater Patagonian Trail is the first and currently only long distance hiking trail in South America that passes the 500 mile / 800 km mark, that is documented in detail, is continuous without any trail gaps and largely avoids roads with transit traffic.
Images
Here you find a selection of images from the Greater Patagonian Trail that are uploaded to Panoramio and displayed on Google Earth.
Used Trails

When planning the Greater Patagonian Trail the first choice were the hiking or horse trails that traverse the remote valleys and mountain passes in the heart of the Andes close to the border between Chile and Argentina. Most of these trails are created and maintained by local herdsmen to drive lifestock to their summer pastures and by settlers that live in solitary.
The second choice were unused or rarely travelled minor dirt roads. Such often neglected roads typically provide access to isolated settlements or villages without atracting any transit traffic. Some of these roads are not maintained anymore and not accessible by vehicle but passable for hikers. Most hiking trails in Europe would fall in this category since the majortiy of hiking trails in Europe are occasionally used by forestry and agricultural vehicles.
Public roads with transit traffic were avoided wherever possible. On such major dirt roads you may find some moderate traffic but they are safe to hike.
Paved roads were the last choice of all.
In some areas the Greater Patagonian Trail crosses through open terrain without a visible trail. Some of these cross-country routes lead through steep and exposed terrain but do not require technical climbing. The cross-country parts also do not pass very dense vegetation and can be hiked without a machete to cut a trail. Valdivian and Magellanic temperate rainforests is very dense and is not suitable for hiking cross-country.
Not all hiking options are recorded yet by GPS since the author investigated the Greater Patagonian Trail with a packraft. There is also a shorter part that could not be hiked because one area was closed at the time of the investigation due to a large wild fire. These to be verified trails may therefore be imprecisely shown in this trail description and by the KMZ files. But the author has reliable information that these trails exist and have been hiked recently. At this time the author has simply no precise GPS record and the route is not sufficently visible on satellite images.
Whereever possible the Greater Patagonian Trail incorporates lake crossings, river downstream floats and even paddeling on fjords with a packraft. If not carrying such a light-weight inflatable boat or if the weather does not permit paddeling then all these water sections can be bypassed on foot, by ferry or with private boat transfers. The river downstream floats do not include whitewater rivers with large rappids.
| Trail Type | Hiking Option | Packraft Option | Comment | ||
|---|---|---|---|---|---|
| Distance | Percentage | Distance | Percentage | ||
| Hiking or Horse Trails | - | - | - | Approx. 40% | Mostly visible trail on any terrain. |
| Minor Dirt Roads | - | - | - | Approx. 35% | No or light traffic only. Can also be an abandoned road or a private road that is not open for public use. |
| Mayor Dirt Roads | - | - | - | Approx. 5% | Public dirt roads with moderate transit traffic. |
| Cross-Country | - | - | - | Approx. 5% | Track that pases through open landscape without a visible trail. |
| To be verified | - | - | Approx. 10 km | Less then 1% | Hiking and horse trails and cross-country parts that remain to be recorded by GPS to update the trail file. |
| Paved Roads | - | - | - | Less then 1% | Only few shorter segments at the start or finish of a sections. |
| Lakes (Packraft) | - | - | Approx. 10% | Lake crossing with packraft. Alternative options are available if not carrying a packraft. | |
| Rivers (Packraft) | - | Approx. 4% | River downstream float. Alternative hiking options are available if not carrying a packraft. | ||
| Fjords (Packraft) | Approx. 15 km | Approx. 1% | Fjord crossings with packraft. Alternative hiking options are available if not carrying a packraft. | ||
| Complete Trail | - | - | 1500 km | 100.0% | - |

Expected Duration
The complete trail can be hiked in one summer season and requires approx. 90 to 120 days if walking with a moderate pace. This inculdes some rest days, resupply bus trips to nearby towns and an occasional day lost to bad weather. One "high-speed-hiker" has done sections 1 to 16 in about 50 days so you can be faster, but I suggest to take some time to enjoy the trail and allow yourself some lesure time while hiking in this pristine region.
If you do not have the time to hike the entire trail then you can customize your trail by selecting some sections only.
Trail Sections
The entire trail consists currently of 18 sections that require between 2 to 10 days each. The sections are between 40 km and 150 km long. Every section connects seamless with the following section and starts and ends near a road or village with public transportation. Therefore each section can be hiked as an individual trail or several sections can be combined to a longer trip.
| Section Name | Number | Country and Region/Province | Next City or Town | Start | Character |
|---|---|---|---|---|---|
| Volcán Descabezado | GPT01 | Chile, Maule (VII) | Curico, Molina | Radal | - |
| Laguna Dial | GPT02 | Chile, Maule (VII) and Bío Bío (VIII) | Talca, San Clemente | Ruta 115, El Melado (Near La Mina) | - |
| Volcán Chillan | GPT03 | Chile, Bío Bío (VIII) | San Carlos, San Fabian de Alico | Pichirrincón, El Inglés | - |
| Volcán Antuco | GPT04 | Chile, Bío Bío (VIII) | Los Angeles, Antuco | El Abonico, Centro de Esquí Antuco | - |
| Laguna El Barco | GPT05 | Chile, Bío Bío (VIII) | Los Angeles, Santa Barbara, Ralco | Trapa Trapa, Puente Ñirehueco | - |
| Guallali | GPT06 | Chile, Bío Bío (VIII) and Araucanía (IX) | Los Angeles, Santa Barbara, Ralco | Guallali, Puente Lomin | - |
| Laguna Marinanqui | GPT07 | Chile, Araucanía (IX) | Temuco, Lonquimay | Ranquil, Carabiñeros | - |
| Volcán Sollipulli | GPT08 | Chile, Araucanía (IX) | Temuco, Lonquimay | Liucura, Aduana Pino Hachada | - |
| Curarrehue | GPT09 | Chile, Araucanía (IX) | Villarica, Pucon, Currarehue | Reigolil | - |
| Volcán Quetrupillan | GPT10 | Chile, Araucanía (IX) and Los Ríos (XIV) | Villarica, Pucon, Currarehue | Puesco or Currarehue depending on route | - |
| Liquiñe and Neltume | GPT11 | Chile, Los Ríos (XIV) | Villarica, Coñaripe | Reyehueico, Puente Reyehueico (Near Liquiñe) | - |
| Lago Pirihueico | GPT12 | Chile, Los Ríos (XIV) | Panguipulli | Puerto Fuy | - |
| Volcán Puyehue | GPT13 | Chile, Los Ríos (XIV) | Los Lagos, Futrono | Puerto Maihue | - |
| Volcán Antillanca | GPT14 | Chile, Los Lagos (XI) | Osorno, Entre Lagos | Ruta 215, Conaf Anticura (Near Aduana Pajaritos) | - |
| Lago Todos Los Santos | GPT15 | Chile, Los Lagos (XI) | Osorno | Lago Rupanco, Las Gaviotas (Near Puerto Rico) | - |
| Cochamó | GPT16 | Chile, Los Lagos (XI) and Argentina, Chubut | Puerto Montt, Puerto Varas, Ensenada | Cochamó | - |
| PN Lago Puelo | GPT17 | Argentina, Chubut | El Bolson | Lago Puelo | - |
| PN Los Alerces | GPT18 | Argentina, Chubut | El Bolson, Esquel | Villa Rivadavia (Previously La Bolsa) | - |
| Current Finish | - | Argentina, Chubut | Esquel | Villa Futalaufquen | - |
See the Section Information below with further detailed information to each section.
Recommended Season


If you plan to hike the entire trail in the correct sequence starting with section 1 than you should leave in December, ideally in the second half of December.
On the first three sections several rivers and high mountain passes need to be crossed. In particular high river-water-levels during snowmelt may make the river crossings difficult and dangerous until December. Therefore leaving before or in early December may put you in risk when crossing rivers or traversing still snow-covered passes. But if you leave after December you may be surprised by the heralds of the winter before reaching the finish of the Greater Patagonian Trail if walking in a moderate pace.
If you do not insist in hiking all trail sections in the correct sequence then you have more options when and where to start. If you want to leave before December and you have a packraft you may in example set out in late October or November in Coñaripe as we did. This is the start of section 11 and the first of the 8 sections with signficant packraft options. Starting with this section before December give you the advantage of floating down the rivers with a comfortable high river-water-level during snow melt. Once you reached the finish of section 18 you can travel by bus to the start of section 1 an hike all the way to the point where you started the track.
On sections 5 to 10 the trail crosses the distribution range of the Araucaria tree. Between February and April the cones of these trees can be harvested and provide plenty of nutritious free food that you do not need to carry on your back. If possible arrange to cross sections 5 to 10 between February and April.
Even if hiking this trail in the recommended season be prepared for sudden weather changes with heavy snowfall, in particular when you are higher up in the mountains.
See the Section Information below that provides an oritentation when each section is best be hiked.
Hiking Direction

The generally recommended trekking direction is southbound even if most sections can be hiked in either direction.
Some sections require an entrance permit if you hike northbound. This limitation applies to section 1 and 12 and the long distance challange 2/3. Without an entrance permit you may be “kicked out” but if you walk southbound this means leaving the property in the direction that you are hiking anyway.
If you are hiking with a packraft then section 11, 17 and 18 need to be taken southbound. Only in this direction you can float down the rivers in your inflatable boat. When hiking without a packraft these section can be taken in either direction using the alternative hiking trails.
For section 15 the recommended trekking direction is also southbound. If you go south you can ask shortly before reaching the Lago Todos Los Santos a local settler for a private boat transfer. In the other direction this may not work as easy. So if you do not have a packraft or if you are unsure that you really want to cross such a rather large lake with a tiny boat, then hike the section 15 southbound.
See the Section Information below with the recommended hiking direction(s) for each section.
Section Information and KML/KMZ Files
| Section Name | Number | Best Season |
Hiking | Packraft Option | Additional Hiking Options | Villages and towns on the trail or near the finish for resupply | |
|---|---|---|---|---|---|---|---|
| Direction | Usage | Direction | |||||
| Volcán Descabezado | GPT01 | Dec-Apr | South ↓ | Side trips only | South ↓ | Summit Descabezado, Hidden Lakes | On the way to the start: Santiago de Chile, Curicó, Molina After section finish: San Clemente, Talca |
| Laguna Dial | GPT02 | Dec-Apr | Any ↑↓ | May be used | Any ↑↓ | Laguna del Maule, Laguna las Truchas | San Fabian, San Carlos, Chillán |
| Volcán Chillan | GPT03 | Dec-Apr | Any ↑↓ | Experts only | Any ↑↓ | Summit Chillan Viejo, Laguna las Truchas, Rio Nuble and Las Aguilas | Antuco, Los Angeles |
| Volcán Antuco | GPT04 | Nov-May | Any ↑↓ | Experts only | Any ↑↓ | Summit Antuco, Around Antuco | Ralco, Santa Bárbara, Los Angeles |
| Laguna El Barco | GPT05 | Dec-Apr | Any ↑↓ | Side trips only | Any ↑↓ | - | Ralco, Santa Bárbara, Los Angeles |
| Guallali | GPT06 | Dec-Apr | Any ↑↓ | Not used | Any ↑↓ | Summit Moncol | Lonquimay |
| Laguna Marinanqui | GPT07 | Dec-Apr | Any ↑↓ | Side trips only | Any ↑↓ | Laguna Escondida and Laguna Verde | Liucura on the trail, Lonquimay |
| Volcán Sollipulli | GPT08 | Oct-May | Any ↑↓ | May be used | Any ↑↓ | Summit Sollipulli | Icalma and Reigolil on the trail, Curarrehue, Pucon |
| Curarrehue | GPT09 | Oct-May | Any ↑↓ | Not used | Any ↑↓ | Fundo Huililco | Curarrehue on the trail, Pucon |
| Volcán Quetrupillan | GPT10 | Dec-Apr | Any ↑↓ | Side trips only | Any ↑↓ | Summit Quetrupillan, Valle Termal | Liquiñe, Coñaripe, Pucon |
| Liquiñe (Hiking) | GPT11 | Oct-May | Any ↑↓ | May be used | Any ↑↓ | - | Liquiñe and Puerto Fuy on the trail |
| Neltume (Packraft) | Oct-May | - | Required | South↓ | - | Neltume and Puerto Fuy on the trail | |
| Lago Pirihueico | GPT12 | Nov-May | South↓ | Beneficial | South↓ | - | Chabranco on the trail, Llifén, Futrono |
| Volcán Puyehue | GPT13 | Dec-Apr | Any ↑↓ | Beneficial | South↓ | Summit Puyehue | Entre Lagos, Osorno |
| Volcán Antillanca | GPT14 | Dec-Apr | Any ↑↓ | Not used | Any ↑↓ | "La Plaza" | El Poncho, Puerto Rico, Panguipulli |
| Lago Todos Los Santos | GPT15 | Oct-May | South↓ | Experts only | South↓ | - | Ralún and Cochamó on the trail, Puerto Varas, Puerto Montt |
| Cochamó | GPT16 | Oct-May | Any ↑↓ | Beneficial | Any ↑↓ | - | Llanada Grande on the trail, Lago Puelo, El Bolson |
| PN Lago Puelo | GPT17 | Dec-Apr | Any ↑↓ | Beneficial | South↓ | - | Villa Rivadavia on the trail |
| PN Los Alerces | GPT18 | Dec-Apr | Any ↑↓ | Beneficial | South↓ | - | Villa Futalaufquen on the trail |

A KML and a KMZ file contain geographic information, in example tracks and waypoints. The KML and the KMZ file format is optimal for display and editing in Google Earth, therefore these formats are used here. To upload this information to a GPS the GPS manufacturers software should be used, which might convert the geographic information in a different file format. Garmin in example uses the GPX file format. There is no significant difference between a KMZ file and a KML file. A KMZ file is simply a compressed KML file. Both are equally suitable for display and editing in Google Earth.
The KMZ file displayed on the satellite map above is optimized to provide a good overview but does not include any waypoints and shows only some of the optional routes. Therefore the KMZ file below should be downloaded and used if you actually plan to hike the entire Greater Patagonian Trail. If you are interested in one or a few sections only then see the section overview below where you can download the trail files for individual sections.
Greater Patagonian Trail with waypoints, options and alternatives: KML/KMZ File for Hiking and Packrafting
The KMZ files for the Hiking Options i.e. "GPT01-18H.kmz" have a H like "Hiking" in the file name. These KMZ files do not contain any of the packraft routes, neither the water parts itself nor the land hiking parts to the lakes and rivers from where you can continue only by packraft. This shall prevent that a hiker without a packraft takes by accident the wrong route and ends up on the shore of a lake or river from where he cannot continue on foot. So if you do not carry a packraft download the KMZ files for the hiking option.
In contrast the KMZ files for the Packraft Options i.e. "GPT01-18.kmz" contains all routes including all hiking routes. There might be good reasons i.e. strong wind or bad weather that make a hiker with a packraft opting for the hiking alternative to avoid i.e. a lake crossing under unfavourable conditions. So if you carry a packraft download the KMZ files for the packraft option.
For sections without any packraft parts only one section KML/KMZ file is published.
Read also the comment to the KML/KMZ file after downloading to understand the structure and nomenclature of this file.
| Section Name | Number | Hiking Option | Packraft Option | |||||||||||
|---|---|---|---|---|---|---|---|---|---|---|---|---|---|---|
| Distance | Ascent | Descent | Days | Time | KMZ File | Distance | On Water | Ascent | Descent | Days | Time | KMZ File | ||
| Volcán Descabezado | GPT01 | 103 km | 4967 m ↑ | 4873 m ↓ | 6 - 8 d | 35 h | GPT01.kml | See hiking option. Packraft may only be used on side trips. | ||||||
| Option: Summit Descabezado | 16.3 km | 2034 m ↑ | 2034 m ↓ | 1 - 2 d | 9 h | |||||||||
| Laguna Dial | GPT02 | 143 km | 5297 m ↑ | 5335 m ↓ | 7 - 10 d | 44 h | GPT02H.kml | 141 km | 9.0 km (6%) | 4643 m ↑ | 4681 m ↓ | 7 - 10 d | 42 h | GPT02.kml |
| Volcán Chillan | GPT03 | 129 km | 6473 m ↑ | 5867 m ↓ | 7 - 10 d | 44 h | GPT03H.kml | 123 km | 23.0 km (19%) | 4818 m ↑ | 4211 m ↓ | 7 - 10 d | 40 h | GPT03.kml |
| Option: Summit Chillan Viejo | 14.9 km | 1334 m ↑ | 1334 m ↓ | 1 d | 7 h | - | ||||||||
| Volcán Antuco | GPT04 | 56.5 km | 1377 m ↑ | 1772 m ↓ | 3 d | 16 h | GPT04H.kml | 58.7 km | 9.2 km (16%) | 1303 m ↑ | 1698 m ↓ | 3 d | 17 h | GPT04.kml |
| Option: Summit Antuco | 8.7 km | 1561 m ↑ | 1561 m ↓ | 1 d | 6 h | - | ||||||||
| Laguna El Barco | GPT05 | 42.9 km | 1485 m ↑ | 1499 m ↓ | 2 - 3 d | 13 h | GPT05.kmz | See hiking option. Packraft may only be used on side trips. | ||||||
| Guallali | GPT06 | 49.5 km | 2525 m ↑ | 2266 m ↓ | 3 - 4 d | 17 h | GPT06.kmz | See hiking option. Packraft can not be used on this section. | ||||||
| Option: Summit Moncol | 3.4 km | 197 m ↑ | 197 m ↓ | 0 d | 1 h | |||||||||
| Laguna Marinanqui | GPT07 | 82.3 km | 2882 m ↑ | 3042 m ↓ | 5 - 7 d | 25 h | GPT07.kmz | See hiking option. Packraft may only be used on side trips. | ||||||
| Volcán Sollipulli | GPT08 | - km | - m ↑ | - m ↓ | 5 - 7 d | - h | GPT08H.kmz | - km | - km (-%) | - m ↑ | - m ↓ | - d | - h | GPT08.kmz |
| Option: Summit Sollipulli | - km | - m ↑ | - m ↓ | 1 - 2 d | - h | - | ||||||||
| Curarrehue | GPT09 | - km | - m ↑ | - m ↓ | 3 - 5 d | - h | GPT09.kmz | See hiking option. Packraft can not be used on this section. | ||||||
| Volcán Quetrupillan | GPT10 | - km | - m ↑ | - m ↓ | 3 - 5 d | - h | GPT10.kmz | See hiking option. Packraft may only be used on side trips. | ||||||
| Option: Summit Quetrupillan | - km | - m ↑ | - m ↓ | 1 d | - h | |||||||||
| Liquiñe and Neltume | GPT11 | - km | - m ↑ | - m ↓ | 2 d | - h | GPT11H.kmz | - km | - km (-%) | - m ↑ | - m ↓ | 2 d | - h | GPT11.kmz |
| Lago Pirihueico | GPT12 | - km | - m ↑ | - m ↓ | 4 - 6 d | - h | GPT12H.kmz | - km | - km (-%) | - m ↑ | - m ↓ | - d | - h | GPT12.kmz |
| Volcán Puyehue | GPT13 | - km | - m ↑ | - m ↓ | 4 - 6 d | - h | GPT13H.kmz | - km | - km (-%) | - m ↑ | - m ↓ | - d | - h | GPT13.kmz |
| Option: Summit Puyehue | - km | - m ↑ | - m ↓ | 1 d | - h | - | ||||||||
| Volcán Antillanca | GPT14 | - km | - m ↑ | - m ↓ | 3 - 4 d | - h | GPT14.kmz | See hiking option. Packraft can not be used on this section. | ||||||
| Lago Todos Los Santos | GPT15 | - km | - m ↑ | - m ↓ | 4 - 6 d | - h | GPT15H.kmz | - km | - km (-%) | - m ↑ | - m ↓ | - d | - h | GPT15.kmz |
| Cochamó | GPT16 | - km | - m ↑ | - m ↓ | 7 - 10 d | - h | GPT16H.kmz | - km | - km (-%) | - m ↑ | - m ↓ | - d | - h | GPT16.kmz |
| PN Lago Puelo | GPT17 | - km | - m ↑ | - m ↓ | 5 - 7 d | - h | GPT17H.kmz | - km | - km (-%) | - m ↑ | - m ↓ | - d | - h | GPT17.kmz |
| PN Los Alerces | GPT18 | - km | - m ↑ | - m ↓ | 3 - 5 d | - h | GPT18H.kmz | - km | - km (-%) | - m ↑ | - m ↓ | - d | - h | GPT18.kmz |
| Complete Trail without Summits | GPT | - km | - m ↑ | - m ↓ | - d | - h | GPT01-18H.kmz | - km | - km (-%) | - m ↑ | - m ↓ | - d | - h | GPT01-18.kmz |
| Complete Trail with 7 Summits | GPT | 1500 km | - m ↑ | - m ↓ | - d | - h | - km | - km (-%) | - m ↑ | - m ↓ | - d | - h | ||
See the Section Table above with the recommended season, hiking direction, hiking options and resupply villages and towns.
Read also the comment to distances, ascents, descents and walking times to correctly understand the recording, calculation and relevance of these numerical values.
Long Distances Challanges

The sections 2 and 3 can be combined with an alternative trail through a pristine area that bypasses the settlement and the road at the finish of section 2 and the start of section 3.
The sections 3 and 4 may also be combined by packrafting the entire Laguna Las Lajas or taking a cross country route on the eastern side of the lake. Both, the packraft and the hiking option, are quite challanging and the optional cross country trail still needs to be verfied. This alternative route bypasses the road to the town Antuco and the tiny ski resort on the base of the volcano Antuco.
It is even possible to combine sections 2, 3 and 4 in a extra-long super-section without passing a single village. This tripple section is a true long distance endurance challange that get you in 3 to 4 weeks through nearly untouched wilderness. If you attempt it, you should be well aware of all the exit routes to walk out in time if you run out of food.
Combining sections 4 to 7 should be considered when hiking these sections. You may get some basic food i.e. in Trapa Trapa at the end of section 4 and in Guallali on section 6. You may also ask the "Puestero" along the trail for food or harvest Araucaria cones to "stretch" the food that you carry and make it last this long combined section. This would save you resupply bus trips to "nearby" villages and towns. Such resupply bus trips take two days or more due to the distances and the low bus frequency. In particular getting at the end of section 6 by bus to Lonquimay and then back to continue with section 7 might be an ordeal.
Also combining sections 13 to 15 is advisable to save you time consuming resupply bus trips. At the end of section 13 you may ask in a settlers home for food and at the end of section 14 you may take the ferry that runs three times per week to a tiny village, resupply in a small shop just next to the embarkation point and return shortly later with the same ferry.
| Section Name | Number | Hiking Option | Packraft Option | |||||||||||
|---|---|---|---|---|---|---|---|---|---|---|---|---|---|---|
| Distance | Ascent | Descent | Days | Time | KMZ File | Distance | On Water | Ascent | Descent | Days | Time | KMZ File | ||
| Section 2 and 3 via Las Truchas | GPT02-03 | 279 km | 12661 m ↑ | 12052 m ↓ | 14 - 20 d | 91 h | GPT02-03H.kmz | 271 km | 32 km (12%) | 10351 m ↑ | 9742 m ↓ | 14 - 20 d | 86 h | GPT02-03.kmz |
| Section 3 and 4 via Las Lajas | GPT03-04 | 174 km | 7233 m ↑ | 7022 m ↓ | 10 - 15 d | 55 h | GPT03-04H.kmz | 166 km | 25.5 km (15%) | 5816 m ↑ | 5606 m ↓ | 10 - 15 d | 52 h | GPT03-04.kmz |
| Section 2, 3 and 4 via Las Truchas and Las Lajas | GPT02-04 | 324 km | 13420 m ↑ | 13208 m ↓ | 17 - 25 d | 103 h | GPT02-04H.kmz | 313 km | 34.5 km (11%) | 11350 m ↑ | 11137 m ↓ | 17 - 25 d | 98 h | GPT02-04.kmz |
| Section 4 to 7 | GPT04-07 | - km | - m ↑ | - m ↓ | - d | - h | GPT04-07H.kmz | - km | - km (-%) | - m ↑ | - m ↓ | - d | - h | GPT04-07.kmz |
| Section 13, 14 and 15 | GPT13-15 | - km | - m ↑ | - m ↓ | - d | - h | GPT13-15H.kmz | - km | - km (-%) | - m ↑ | - m ↓ | - d | - h | GPT13-15.kmz |
Trail profile
The following image shows the altitude profile along the trek, excluding the side trips, and considering the use of a raft. The red vertical lines separate the different sections. Click to enlarge

Entrance Permits and Fees

The Greater Patagonian trail is not an official trail that is set up and managed by a government agency. Is simply a compilation of horse trails, minor roads and some cross country sections that pass over private properties and state owned land.
Nearly the entire trail can be hiked without entrance permits or paying entrance fees. And what is even better: many of the humble people that live along the trail will welcome you or even invite you to stay. Here hospitality matters!
But there are a few exceptions; some are already briefly mentioned above under Hiking Direction.
Unfortunately the public right of way is vague and sometimes ignored in Chile. By Chilean law the access to the coast, to lakes and to rivers is a public right but there are numerous locations where this gets disregarded. There are simply no penalties if someone unlawfully denies passage. I'm not sufficiently familiar with Chilean law to state if a similar public right of way applies to all the connecting trails and roads on private properties. But if it exists it’s occasionally disregarded. Some rich landlords with huge plots employ guards and instruct them to deny access to anyone.
Entrance Permits and Challenges


Section 1
Laguna Mondaca: I was recently advised that a signpost was place at the pass between the Laguna Las Animas and the Laguna Mondaca denying access to the Laguna Mondaca. If you want to avoid a discussion with an overeager guard at this lake you may take the short cut that leads you directly to the hot springs “Termas de Asufre”. Otherwise you may be asked to continue on the regular trail after having reached the lake.
Hydropower Station Cipreses: The Hydropower Station Cipreses is owned by Endesa and controls the valley between the Route 115 and the Laguna de La Invernada. Permanently manned gates control the northbound access from the Route 115 but there are no similar barriers when entering the property southbound over the mountains in example when coming from the volcano Descabezado. An access permit can be requested in advance and is normally granted. See the wikiexplora article "Laguna y Cráter Los Hornitos" for further information.
Long Distance Challange Section 2/3
Fundo Las Truchas: The fundo Las Truchas is owned by a regional big farmer. When he purchased this ranch he first kept it open for public access to the attractive Laguna Las Truchas. Unfortunately some locals don’t treat their environment with respect and litter or fish without limits. The owner got annoyed and now denies public access in particular to local citizen. When entering the fundo Las Truchas northbound you may be send back by the guard, who lives 2 km south of the Laguna Las Truchas from late spring to autumn. If entering southbound you may be asked to leave the property in the direction you are hiking anyway.
Section 3 "Bad Weather Exit Route"
Hydropower Station El Toro: The Hydropower Station El Toro is owned by Endesa and controls the valley Rio Polcura upstream of Abanico. A permanently manned gate controls the northbound access from Abanico. There are no similar controls when entering the property southbound from the the Laguna de Las Lajas. An access permit may be requested in advance but no specific information are available where this can be done. Anyway, this restriction is not of much relevance since the regular trail on the ridge can be hiked in either direction. You only get to the Hydropower Station El Toro if get down from the ridge on "Bad Weather Exit Route".
Section 12
Reserve Huilo Huilo: During the later days of the Pinochet Regime large parts of the state owned forest around the Lago Pirihueico were sold under obscure circumstances to the German immigrant Victor Petermann. He later converted the forest into a “private for profit natural reserve”. The emphasis seems to be on profit. Permanently manned gates now limit access to guests of the luxury resorts on this immense property. Wood logging continues in more hidden parts of the “profit reserve”. When we attempted to take the former public road from Puerto Fuy to Pirihueico we were turned back on several of the gates. For this reason we took the ferry over the lago Piriheuco and walked the same road but from the other side where we did not encounter any manned gates or objections. See the wikipedia article to the Complejo Forestal y Maderero Panguipulli.
Fundo Chihuio: The fundo Chihuio is situated north of the Termas de Chihuio and owned by a rich businessman. The guard lives at the southern entrance to the ranch. He is instructed to deny access to the former public road towards Puerto Fuy and Pirihueico. When hiking southbound you will leave the property at the entrance where the guard lives.
Section 13
Fundo Carrán: The Fundo Carrán is located south of the Lago Maihue. We crossed the Lago Maihue southbound by packraft and entered the fundo Carrán unknowingly from the shore of the Lago Maihue. We than walked about 5 km until we reached a locked gate just before a public road. We could easily climb over the locked gate to continue on the public road. On this locked gate is a signboard that prohibits public access.
Entrance Fees

Section 13
Southbound Access to Cordon Caulle: A very fiendly and helpful older couple lives at the northern access to the Cordon Caulle and volcano Puyehue. They own the forest with the road that provides access to volcanic area where 2011 a major eruption occured. They offer shelter if the weather does not permit a crossing of the volcanic plateou. They charged a 6'000 CLP entrance fee.
Northbound Access to Cordon Caulle: The restaurant "El Caulle" is situated at the southern access to the Puyehue and Cordon Caulle. They maintain the refuge higher up on the foot of the volcano Puyehue. They charged a 10'000 CLP entrance fee.
Conclusion
When challenged on the trail explain friendly that you are just a hiker and that you do not want anything else than passage to the next road or town. Hikers are rarely seen on most of the route and some people may suspect other interests because they simply don't know the concept of hiking. You may explain how far you already walked to gain the sympathy and respect of the guard or land owner. Guarantee that you will carry all your waste and that you will not leave any traces.
What we experienced on the trail seems to mirror the attitude of the Chilean society: The humble poor people on the trail opened the doors to their houses to give us shelter and they literally shared their bread with us without even asking for it. But some of the super-rich denied passage over their immense properties on which they normally don’t even live when kindly asking for permission to pass.
Logistical Considerations


Tourist Visa
The vast mayority of the countries in Europe and America do not need a visa to visit Chile as a tourist. These people receive a tourist permit that allows them to stay up to 90 days in Chile. With an estimated duration of 90 to 120 days it is possible to complete the entire trail in 90 days but leaves little margin for rest days or weather related delays.
The easiest way to renew your permit is travelling to Argentina before completing your 90 days and return a few days later to Chile. On re-entry you will normally be granted another 90 days. Such a trip can be combined with a resupply stop in a nearby town.
Recommendable "visa trips" with public transportation are:
- Section 9: From Curarrehue in Chile to Junin de Los Andes or San Martin de Los Andes in Argentina
- Section 13: From Osorno in Chile to San Carlos de Bariloche in Argentina
If you do not start the trek at section 1 but if you do the packraft sections 11 to 18 first you will cross the border from Chile to Argentina on foot at the end of the last section and renew your turist permit when returning to Chile. This will give you enough time to hike sections 1 to 10 in a comfortable pace.
If you insist in not taking any bus or motorized vehicle during the entire trek you have three options:
- You hurry up to reach the finish of the Greater Patagonian Trail in Argentina within 90 days counted from your arrival in Chile.
- You can walk on foot from Icalma in Chile to Villa Pehuenia and back (Section 8, 16 km one way).
- You can request a turist permit extension in Chile. This can be donde in any of the 53 provincial capitals of Chile.
Importation of Food
Chile is very cautious when it comes to importing food, plants and animals. To minimize the risk of introducing pests,invasive plants and animals such imports are highly regulated and controlled. Therefore individuals are strictly banned to bring fresh fruits, vegetables, raw milk or meat products to Chile. Only processed sterile food can be imported in concealed packing’s, in example all heat treated canned items in closed containers. Thorough checks are performed by the SAG (Servicio Agrícola y Ganadero) on the airport and the border checkpoints from neighbouring countries.
- Example of strictly banned items:
- Fresh and dried fruits
- Fresh cheese
- Raw meat and raw meat products like ham and sausages
- Honey
- Example of normally accepted items:
- Bread, cookies and other baked items
- All canned items even if containing milk and meat products
- Sweats like chocolate, candies and cereal bar
- Cereals, corn flakes and chocolate powder
- Pasta, rice, flour and dehydrated potato puree
- Instant meals like dehydrated trekking food in concealed bags
When crossing the border to Chile you need to fill in a declaration if you are carrying any plant or food products. On this declaration the definition for plant or food products is very wide and includes all the permitted items as well. Therefore the best and only correct thing is to always state YES. If ask explain that you are aware of the restrictions and that you carry processed food and give examples.
If you state NO but something banned is found you will be charged a high fine.
You should also clean your boots from visible mud since mud may contain seamen of invasive plants.
Theoretically the same rules apply when crossing into Argentina but controls are often much more relaxed and you do not need fill and sign a declaration.
Resupply at Nearby Towns
There are no proper shops along the first seven sections of the trail. The first regular food store on the trail comes after 600 km at the finish of section 7. But there is a road with public transportation at the end of each section that gives you the opportunity to take a bus and to travel to the next village or town to resupply. See the table under trail sections with suitable resupply villages and towns.
Resupply by Bus
The product range in smaller villages and towns is limited. In particular dehydrated trekking food may not be offered at all. If you prefer to have some special stuff that you find only in Santiago or that you bring with you from overseas you have the following option: You pack a box with food and other gear in Santiago and send the box with one of the mayor bus companies to a town where you plan a resupply stop. To send the box you do not need any address in this town; all you need to do is making yourself the recipient of your own package. The bus company will ship your box to this town in 1 or 2 days and store it until you pick it up. There you can take out of your box whatever you need and resend the box with the remaining stuff to the next resupply town where it will be stored again. Storage of up to 30 days is free of charge. This transport service by busses is called: "encomienda".
I advise you not to use this service offered by JAC. They lost one of our packages and were incredible poorly organized and ignorant to give us at least the legally required minimum refund (which was far less than the actual value). Turbus made at least a more organised impression when compared to JAC. Anyway, you should better not send valuable items i.e. a packraft but only items whose loss does not jeopardize your trip. If you plan to send a valuable items anyway you should have at least the orginal purchase receives of these items with you. If you present these receipts before sending the package you may increase the refund value in case of loss to a substanially higher value. Without such a receipt only a minimum can be declared (50,000 to 100,000 CLP depending on the company).
Suitable resupply towns with bus cargo stations are (bus company in brackets):
- Talca (Turbus)
- San Carlos (Turbus)
- Chillán (Turbus)
- Los Angeles (Turbus)
- Pucon (Turbus)
- Osorno (Turbus)
- Puerto Montt (Turbus)
- Puerto Varas (Turbus)
See also the table with the Trail Sections for a full listing of resupply towns on or near the trail.
A true thru-hike without resupply bus trips would require the setup of food depots on strategic points along the route.
Food Supply on the Trail

On this trail, in particular on the first seven sections you will meet herdsman on the summer pastures with their animals mainly cattle, sheep, goats and horses. Depending on the altitude and the snowmelt they migrate up between October and January and return home in April or May. These herdsman, locally called "Puestero", live in improvised permanent shelters, called "Puesto". They bring large quantities of food with their horses and mules up in the mountains. You may ask them for food, in particular for flour and bread or whatever they are willing to sell. With flour, dry yeast and salt you can bake your own fresh bread on the trail. If you are desperate for meat they may sell you a goat or a sheep but be aware, the smallest quantity for sale is typically half an animal. To communicate with the locals you need to speak Spanish.
On section 5 to 10 you will cross the distribution range of the impressive Araucaria trees, that are ancient evergreen coniferous trees. What we liked on these living fossils were not just the imposing figure, but the nutritious female seed cones that are rich in carbohydrates. These fruits or "piñones" were the main staple food for the indigious Pehuenche people and they taught us how to harvest and prepare them. You can gather these starchy Araucaria "piñones" between February and April.
Traditional Food


This is not a listing of all the standard trekking foods like pasta and cereals. If you attempt this long distance trail you should know all this by heart. This section lists and describes selected traditional food items that are typical for this region but may be less known outside or named differently.
Piñones: As already mentioned under Recommended Season and Food Supply on the Trail you can become a gatherer on sections 5 to 10 and collect a good part of your food yourself along the trail. You just need to get the timing right and carry a strong string to harvest the mature cones of the female Araucaria trees. According to Wikipedia the name Araucana is derived from the native Araucanians who's main staple food were the nuts or seeds of the Araucaria tree. A group of Araucanians living in the Andes, the Pehuenches, owe their name to their diet based on harvesting of the Araucaria seeds. Pehuen means Araucaria and che means people in the native language Mapudungun.
The natives use a lasso to harvest the mature cones. As a hiker you probably will not carry a rather heavy lasso but you may bring a strong string with you. By trial and error we eventually choose to connect long sticks in example branches, bamboo grass and/or our hiking poles to lift a sling over a single cone and then break the cone off by pulling against the growth direction. Once you have the cone down you can open the cone with a wedge and a stone as shown on the picture above. The seeds then need to be separated and boiled for about 30 minutes with the husk. Once boiled the husk can be easily removed. Just squeeze the husk and the eatable seed will slip out easily. You can eat the seed simply cooked or fry them later.
Harina Tostada (Chile) or ñaco (Argentina) is toasted ground wheat and the staple food of the herdsmen. It comes as a brownish powder and tastes like corn flakes but it needs to be mixed first with a liquid to eat. The most common form is mixing with water but also beer, wine or juice can be used. Also sugar may be added if mixed with water. Depending on the mixing ratio it will be a thick paste or a liquid and makes a the perfect snack during the way. Try yourself and find out how you like it most. You can buy it in all rural stores but also the big super markets sell it. It's the perfect trekking food because its nourishing and takes little space in the backpack. See the wikipedia article for more information to this versatile staple food.
Tortilla de Rescoldo is a white bread that was backed in the hot ash of a fire. Most puestos don't have a proper oven to bake bread but use the accumulated ash of the fireplace instead. The dough is made as usual with wheat flour, salt and (dry) yeast. After the dough was prepared and given the typical rest the dough is gently put in a pit in the hot ash and then also covered with hot ash. After about 10 to 15 min the bread is turned and covered with hot ash again to bake it evenly on both sides. To not burn the bread the hot ash must be free of glowing charcoal. It requires quite some experience to get the temperature and the timing right. Also the fireplace must be in use for days or weeks to accumulate sufficient ash. A typical campfire will not work because the fire itself is to hot and amount of ash is insufficient.
To make fresh bread on the trail ourself we used our two stainless steel pots and the lid. With some selfmade wireclips we suspended the slightly smaller pot within the bigger pot. This created a small but fully functional oven because the air gap between both pots protected the content from burning when placed in or next to the fire. With this oven we did not only bake fresh bread but also pizza and a onion pie. It needs some trial and error to learn how to get the temperature right and regular turning help to bake the content evenly.
Sopaipilla (Chile) or Torta Frita (Argentina) is fried white bread. The same standard dough made with wheat flour, salt and (dry) yeast and given the typical dough rest period of 15 to 30 minutes. Round flat dough-cakes are formed with a hole in the middle and gently put into a pot of hot oil of fat over a fire. The hole in the middle is required to move and removed the Sopapilla with a stick.
Chivo or Cordero al Palo: Puesteros occasionally butcher a male goat or sheep when they meet with other herdsmen or when they receive a visit to share an abounded and delicious meat feast. Female animals are normally preserved to maintain the flock (an rare example of male discrimination). The skinned and cleaned animal is cut into pieces and stack on a wooden pole ("palo" in Spanish). The pole is then placed next to the fire and regularly turned until the meat is ready to eat. It's cruical that the meat is well cooked to kill all potential parasites. You need to be lucky to arrive just in time for such a feast. Alternatively you may ask the puesteros along the route if they have some meeting left or if they are willing to sell one animal and butcher and prepare it with you. The smallest quantity for sale is typically half an animal ("medio canal"). Once the meet is well cooked over the fire you can carry the left overs and consume it during the next two or three days.
Yerba Mate is a energizing caffein-rich hot drink. You fill about half a cup with the tee-like "yerba", pour hot water over it and drink it with a special straw that acts at the same as an filter. This straw is called "bombilla". You can pour again and again water over it to keep drinking. Sharing mate with other people is a common ritual in these region. You will certainly be offered this rather bitter drink when you meet and chat with the locals. See also the wikipedia article to Mate for more information.
Mote are wheat grains, that were boiled and removed from its husk and then dried again for long term storage. Mote is probably not a optimal trekking food because it needs to be soaked in water for several hours before boiling. But settlers and herdsmen often carry mote and use it as an ingredient for stews and other meals.
Recommended Equipment


Packraft
A packraft is a light-weight inflatable boat designed to be carried in the backpack when not needed but to carry the backpacker and his backpack over lakes and rivers when he needs it. A packraft is not required for this trail but very beneficial on sections 11, 12, 13, 15, 16, 17 and 18. It may also be used on sections 2, 3, 4 and 8. On section 1, 5, 7 and 10 it can be used for smaller side trips on lakes that are located next to the trail.
Here you find some images of our packraft. We used the "Explorer 42" from Alpackaraft. The total weight of the boat with paddles, waterproof bags and water gear was approx. 6 kg or 3 kg per person if shared. Recently new manufacturer entered this market, i.e. MRS and Nortik, offering similar suitable packrafts. In particular the "MRS - Adventure X2" is probably a good choise for a group of two hikers. You find these inflatable boats in the German Packrafting-Store. Also several other packraft related items are sold by this specialized online store.
The packraft made our trip much more diverse. It was so great to walk to the shore of a lake or river, take the backpack down, inflate the boat, store the gear, take a seat and paddle off.
At two larger lakes you can alternatively take a daily ferry (Lago Pirihueco) or a private boat transfer (Lago Todos Los Santos). For all other lakes and rivers alternative trails, that circumvent the water are included in the GPS File for Trekking below. So you can bypass on foot all water sections if you do not have a packraft or if wind and weather does not permit the crossing of a lake with a rather tiny boat.
The Laguna De Las Lajas and the Lago Todos Los Santos are the most challenging lakes of this trail for packrafting. Due to their size and orientation wind can build up quickly relative high waves. Since we did not carry a dry-suite and since we were packraft novices when staring this trail investigation we did not deer to cross these lakes on our tiny packraft. There is a beautiful trail along the ridge next to Laguna De Las Lajas and to cross Lago Todos Los Santos you can take a private boat transfer. So there is no need to take chances if you are not well prepared for this packraft challange. I would advise against crossing this lake by packraft except if you carry a dry-suite and you have plenty of packraft experience and consider yourself an expert.
GPS and Electronic Map
The trail is mostly unmarked, partly not visible and only smaller fractions are documented with maps. Therefore a GPS is essential for navigation. In addition an electronic topographical map is recommended.
We used a Garmin GPS with the Garmin TOPO Chile Deluxe electronic map (TOPO Chile Deluxe sold for 80 USD). The topographical profile, rivers, lakes, road and towns are precisely mapped. Only smaller streams, smaller lagoons and some trails are partly incorrecly placed on this electronic map. The Garmin TOPO Chile Deluxe is more precise than the TOPO Andes (see below) and has more details but covers only Chile and is good for section 1 to 16 only.
Garmin now offers also a electronic topographical map that covers all Chile, Argentina and Bolivia (TOPO Andes sold for 100 USD). If you are planning to hike the entire trail and future extensions to the south then the TOPO Andes map is the suitable choise.
Satellite Tracker
The Greater Patagonian Trail leads partly through rather isolated uninhabited areas with no mobile phone coverage at all. In case of an accident a satellite based emergency communication devise may contribute to your survival.
- SPOT offers a light weight emergency beacon that when pushing an emergency button submits a distress signal via satellite with your GPS position to a rescue centre. This devise can also be set up to regularly send the GPS position and display the track on the internet. We carried such a personal satellite tracker and our families and friends stayed much more relaxed because they could see us move day by day through the mountains. The limitation of this devise is, that is cannot receive any messages or send messages written on the trail. You find further information to this devise on the SPOT manufacturers homepage.
- InReach from Delorme offers a similar devise with all the above capabilities. But on top of it, it can send and receive 160-character SMS text messages with GPS coordinates to mobile phones or email addresses worldwide and post updates to social media. See the InReach manufacturers homepage for more information.
Solar Battery Charger
The partly long stages and the limited supply along the trail requires a proper power management for the GPS, the camera and all other electronic gear. If you rely on the GPS for navigation you need to make sure to have in functional whenever needed.
We opted to carry a solar power panel to recharge all our batteries while hiking. Carrying regular batteries for up to 3 weeks would have meant a substantial extra weight. We choose the model Nomad 7 from GoalZero with the Guide 10 Power Pack.
Required Skills and Capabilities

The Greater Patagonian Trail requires endurance not only because of the total trail lenght but the rather long trail sections. The first three sections exceed 100 km each without regular resupply points on the route. If combining sections the distances become even larger and can reach or exceed 300 km.
Hiking this trail requires a detailed planning and preparation before and during the hike. The gear needs to be reduced to what is essential. Before each section the correct type and quantity of food needs to be selected and carried.
The isolation of some parts of the trail demand a self-reliant attitude and cautious behaviour. The hiker needs to feel confident and move safely in various terrains, that reach from snow covered mountains passes to dense tempered rain forests.
Sudden weather changes may happen anytime in this mountainous region. The hiker needs to be prepared and equipped to master in example an surprising snow storm and closing in clouds while crossing a mountain pass.
Good navigational skills are essential since the route is mostly unmarked. The hiker needs to recognize and follow the often only vaguely visible trails that frequently peter out or divide into different branches. Here the hiker needs follow his "sixth sense" while verifying and comparing the taken route with the recommended GPS tracks. Good knowledge in setting up and using a GPS is compulsory.
This trail should only be attempted with at least some Spanish knowledge and practice. You need to be able to introduce yourself, explain what you are doing, buy food and other supplies and organize your bus trips to and from the trail. Hardly anyone along the trail speaks or understands even a few words in English.
The following skills are NOT required:
- Rock climbing
- White water rafting
- Any super-man-capabilites
Code of Conduct

The trail leads mostly through unspoiled wilderness with little human intervention. And where you meet some settlers or herdsmen you are welcome and get treated as honourable guest. To maintain this I plead all hikers to follow this code of conduct:
- Leave no trace and in particular no litter. All packings that can be carried with content can be returned when empty.
- Make camp fires only where permitted and where and when it is safe to do so. Don't light a fire in dried out areas or when wind can carry sparks that may ignite nearby vegetation. Use only death wood and put the fire out with plenty of water. Don't leave the fire or go to sleep before having it put out completely.
- Don't abuse the hospitality of the people along the trail and pay fairly for what they share with you. Using a trail or camping in a not maintained place should be free of charge but if you get invited to a meal or use a camping ground that was installed by a local settler pay what you would get charged in other places. Don't ruin the hikers reputation by misusing the generosity of humble people. They might refuse to take your money but insist because they need it; it's part of the hospitality.
- Near a Puesto you find often a good camp spot because the grazing animals create and maintain nice patches of grass. If the puesto is inhabitated always introduce yourself and ask first for permission before pitching your tent. This also calms down the dogs.
- If you are caught by bad weather feel free to knock on doors and ask kindly for shelter. Helping in such situations is part of the ethics in the mountains.
- Don't enter locked Puestos except in emergencies. This is also for your safety since poorly ventilated and maintained puestos pose a Hanta virus infection risk. See also Deseases.
- Leave all gates in the condition as you found them. If a gate was closed, close it after you. If a gate was open, leave it open.
- If you meet people on horses on a narrow trail step to the side and let them pass. It's for your own safety.
- Respect the rights of the land owners. Don't dispute over rights of way but ask kindly for permission to pass.
Dangers and Annoyances


Trail Condition
The Greater Patagonian trail is not an official trail that is set up and managed by a government agency. Is simply a compilation of horse trails, minor roads and some cross country sections over private properties and state owned land. This means that large parts of the route are not monitored or maintained by public authorities. Most of the horse trails were created by local herdsman to drive animals to their pastures and other parts of the route are current or disused wood logging roads. Therefore the maintenance depends on the needs and initiative of these locals users.
Severe weather and volcanic eruptions can destroy or alter a route and if not maintained vegetation can completely close a trail within a few years in particular in the tempered rain forest. Therefore attention and good judgment are needed when hiking the Greater Patagonian Trail because some trail sections may become impassable or change. Check your GPS regularly but don’t follow blindly the GPS track.
In worst case you need to turn around and seek an alternative route. A GPS with sufficient backup power and a detailed electronic map is essential in such a situation.
River Crossings
River Crossings are possibly the greatest hazard on this route in particular if attempted during inappropriate times or at not suitable locations. Snowmelt or heavy rain can raise the water level substantially and make a rivers crossing impassable that during other times is easily forded. Also the bed of a river can change and a location that once was suitable for crossing can became too deep or rapid. Therefore do no rely on the GPS waypoint for river crossings but always judge the situation yourself before attempting to ford a river. You may seek an alternative location along the river or turn around and take an alternative route if a river crossing is hazardous.
Rivers should only be crossed with shoes and hiking poles for added stability. If hiking together cross the river in pairs with arms firmly joint together. If the ford is wide enough you may cross the river not perpendicular to the flow direction but inclined in the flow direction. Some even recommend to carry and use a rope for difficult river crossings.
Weather
Storms with heavy rain may arise on all parts of the trail anytime and in elevated areas heavy snowfall may occur even in midsummer. Therefore be always prepared and equipped for sudden weather changes.
In bad or instable weather do not climb a pass or venture into exposed terrain above the tree line. Rather wait or return and seek shelter if the weather changes in a concerning manner. Carry at least a poncho to protect yourself and your backpack if rain or snow closes in. In instable weather keep your eyes open and memorize potential protected camp sites and “Puestos” if you are forced to turn around to seek shelter. Selected suitable locations are documented with waypoints in the KMZ file for trekking.
While hiking we were told about several incidents along the trail where local inhabitants and outside tourists got lost, disappeared without trace or froze to death in bad weather. Don’t add another story!
Sun
Don’t undermine the sun, in particular when crossing snow fields or large camps of bright volcanic ash. A proper head cover, sun cream and sun glasses are essential to prevent sun-burns and snow-blindness. Don’t just carry this stuff but use it preventively.
Volcanic Erruptions
To be issued.
Earthquakes
To be issued.
Isolation
Some parts of the Greater Patagonian Trail cross rather isolated areas. In some areas you can walk for days without seeing another human being. Therefore be prepared to help yourself in case of an accident. Always carry a sufficient first aid set.
If you are unable to continue it might take weeks or more for someone else to pass and mobile phone coverage is very limited along the trail. Therefore a satellite based emergency communication devise may contribute to your survival. SPOT offers a light weight emergency beacon that when pushing an emergency button submits a distress signal via satellite with your GPS position to a rescue centre. For further information see the recommended equipment.
Wild Animals
There are no bears in South America. This makes hiking more relaxed if compared with North America. You can cook at your tent and store all you food in your tent without fearing a visit of a hungry bear.
The largest living predator in Patagonia (apart from humans) is the Puma, also called Cougar or Mountain Lion. They normally hide and avoid contact with humans. Wikipedia states: “Attacks on humans are very rare, as cougar prey recognition is a learned behaviour and they do not generally recognize humans as prey. (…) As with many predators, a cougar may attack if cornered, if a fleeing human stimulates their instinct to chase, or if a person "plays dead". Standing still however may cause the cougar to consider a person easy prey. Exaggerating the threat to the animal through intense eye contact, loud but calm shouting, and any other action to appear larger and more menacing, may make the animal retreat. Fighting back with sticks and rocks, or even bare hands, is often effective in persuading an attacking cougar to disengage.”.
For more information see: Cougar attacks on humans on wikipedia.
Wild boar: Are other potentially dangerous animals. They were introduced by humans and became an invasive species. These omnivores range in particular the Araucania and love Araucaria "piñones". Wikipedia states: “Although wild boars do not generally pose a threat to people, they occasionally attack humans. (…) Male boars become most aggressive during the mating season and may charge at humans at such times. Occasionally, female boars will attack if they feel their piglets are threatened, especially if a human physically comes between them and their young. Although a majority of boar attack victims recover with medical treatment, fatalities do occasionally occur.”
For more information see: Wild boar aggression towards humans on wikipedia.
Fox: Chilla or Grey Fox (Licalopex griseus) before identified as Pseudalopex griseus is a species of the southern cone of South America that is distributed on both sides of the Andes mainly covering Chile and Argentina. Their diet is varied ranging from small and medium mammals, carrion, birds, reptiles, arthropods and fruits. When there escazes food or some group of small livestock (goats and / or sheep) mainly young around, Fox no doubt a few hunting mainly at night, so it is an enemy of the carriers. We have no record or history of attacks on humans but we recommend caution must always be a wild animal. This Fox is somewhat shy and fearful of the diver but very quiet, curious, stealthy and opportunistic. With this background we encourage walkers not to leave food scraps outside, or around the tent and not even leave any kind of shoes within your reach because we have known curiously experiences of other hikers who have lost some shoes because of this Fox.
Domesticated Animals
Dogs: To be issued.
Cattle: To be issued.
Deseases
The most dangerous animal for humans in Patagonia is a quite small one: the long-tailed pygmy rice rat (Oligoryzomys longicaudatus) and the long-haired grass mouse (Abrothrix longipilis). These two species are known to carry and transmit a particular aggressive strain of Hantaviruses with a mortality rate of 30% to 40%.
The typical incubation time is 1 to 3 weeks but also cases with 3 to 45 days between the suspected exposure and the disease outbreak have been reported. Early symptoms are similar to a flu and include fatigue, fever and muscle aches. Other possible symptoms are headaches, dizziness, chills, nausea, vomiting, diarrhea and abdominal pain. Seek medical attention if you experience such symptoms.
Wikipedia states: “There is no known antiviral treatment, but natural recovery from the virus is possible with supportive treatment. Patients with suspected hantavirus are usually admitted to the hospital and given oxygen and mechanical ventilation support to help them breathe during the acute pulmonary stage. As the virus can be transmitted by rodent saliva, excretia, and bites, control of rats and mice in areas frequented by humans is key for disease prevention.”
For more information see: Hantavirus on wikipedia.
The main source of infection are inhaled aerosols of mice droppings. Therefore the recommended preventive measures are:
- Avoid any contact with mice and mice dropping.
- Do no use any shelters that are not well ventilated or where you can see any traces of mice.
- Keep your food protect and away from mice in particular during the night. The same applies to your pots, dishes and waste to not attract mice.
- Camp in clean, open area that do not provide hideouts for mice. Avoid shrubbery.
- Use a tent with a closed floor and a fully concealed inner tent.
- Drink only secure water and disinfect or boil it if necessary.
- Do not eat wild fruits that may attract mice as well.
Insects
Horse-Flyes or Tabanos will form an annoying aerial escort on some parts of the trail. They are abundant in December and January in humid parts of the River- and Lake District. These rather noisy flyers get attracted by dark moving objects in bright sunlight. So avoid dark cloth and do not try to chase them off with rapid movements, otherwise your will attract the attention of more of them. They inflict painful bites but do not leave an itching stitch.
Other notable Long Distance Trails and Hikes
Long Distance Trails
Huella Andina
To be issued.
Sendero de Chile
In the year 2000 the Chilean government announced the plan of creating a continious trail that spans all Chile from the northern most tip all the way to the southern end of the country. The total length of this hiking trail was projected to be between 8000 and 9000 km.
By now, 15 years later, the objective has shifted. Instead of a continious trail that spans the entire country numerous smaller mostly unconnected trails are published. These trail are spread over the entire country to promote and facilitate access into the Chilean countryside for the local population. In July 2015 a total of 135 trails with a combined lenght of 2663 km are published on the Homepage of "Sendero de Chile". The average trail lenghs is 19.7 km and two trails exceed the 100 km mark. Most of these trails are established routes that are used for decates by the local population in the foodhills of the Andes close to the main population centers. But some of these routes are in the main Andes mountain range. The Greater Patagonian Trail incorporate some of these routes.
See also the homepage of the "Sendero de Chile" foundation for further information.
Noteable Long Distance Hikes
Settlement of the Americas
See Wikipedia: Settlement of the Americas
George Meegan: Across Americas
George Meegan is a British adventurer born in 1952. From 1977 to 1983 he crossed Americas from the southern tip of South America to the northernmost part of Alaska at Prudhoe Bay in an unbroken walk. He completed this 30,608 km km long journey on foot in 2,425 days and documented this truly epic hike in his book "The Longest Walk" (1988). See also Wikipedia: George Meegan.
Deia Schlosberg & Gregg Treinish: Across the Andes
Gregg Treinish and Deia Schlosberg, two adventurers from the US, hiked between 2006 and 2008 from the Ecuadorian capitol Quito all the way to the southern tip of Tierra del Fuego. In a little under two years they walked 12,500 km covering 55 degree of latitude. In 2008 they were honoured by National Geographic as “Adventurers of the Year” for their achievement. The trip journal and the approximate route are published on their homepage "Across the Andes".
Jeannette Leenders & Arlen Hoebergen: Across Chile
Jeannette Leenders and Arlen Hoebergen, two Dutch athletes, walked in 2011 and 2012 from Visviri, the most northern settlement in Chile to Cabo Forward, the most southern mainland point of South American continent. They covered 6,242 km during this 290 day journey. In contrast to most hikers they did not carry a backpack but pulled a two-wheel-wagon on their trip and followed mostly roads. Your can read more about their hike on their homepage "El desafío mas largo del mundo".
Eyal Schwartz: Across Patagonia
See Homepage: Sendero De Patagonia
Creation of the Greater Patagonian Trail


Idea for the Trail
I did my first hike in Patagonia in 2002 and returned several times in the following years. As most casual hikers I used a trekking guide book (Lonely Planet: "Trekking in the Patagonian Andes") and ventured only onto trails described by books or printed on maps. It did not even appear to me to go beyond.
A few years later I was recommended the "Adventure Handbook Central Chile" from Franz Schubert and Malte Sieber. This booked introduced me to the often overlooked area between the Chilean capital Santiago and Patagonia. Before I always passed this area without seriously considering to stop before reaching Patagonia.
In 2011 my girlfriend and me planned to do the hike to the Laguna las Truchas that is recommended in the "Adventure Handbook Central Chile". But before we set out we were told by locals that the landlord does not let pass any backpackers. The locals recommended a different trail instead for which we had no guide books, no maps and no guide willing to lead us. After long considerations we eventually took our backpacks and hiked on our own to the impressive Laguna Dial. We were surprised to walk on a well maintained trails where maps are simply blank. In the following months and years we repeated this experience again and again: there are plenty of perfectly hikeable trails where maps show nothing but wilderness. I also noticed that these trails are often visible on Google Earth, in particular in areas without dense forest, which gave me a new tool to plan hikes.
Two years later in 2013 I was wondering how far you can possibly walk through the Andes using the few pubished the many undocumented trails. More out of curiosity I started searching for a continuous trail in Google Earth trying to incorporate the best trails hiked so far. In a lengthy tedious search using Google Earth and all other material available to me I planned a constantly growing trail. I finally had a route that I estimated to be 1400 km.
Planning of the Trail
The Greater Patagonian trail is not an official trail that was planned and set up by a government agency. It’s better: it’s a compilation of the most beautiful and diverse hiking and horse trails, minor roads and cross country sections through the Patagonian Andes selected by a passionate hiker.
This genesis prevented that the routing of the trail was compromised and deformed by local interests and political constraints. The track could be chooses freely on either side of the border; on the Chilean side and the Argentine side of the Andes. There were also no “must-include” towns, villages or places because influential local politicians decided so. Simple the most attractive hikeable route could be selected, without any influence or other interests.
The route planning and trail selection conditions were:
- The trail leads through the heart of the Andes along the main mountain chain of the cordillera
- The most beautiful and diverse existing tracks are selected for this long distance trail
- Hiking paths and horse trails are preferred over roads with transit traffic even if this means a reasonable detour
- All included cross country sections are feasible for hiking without climbing gear or a machete
- The route is continuous without any gaps
- The track can be hiked legally without unauthorized border crossings
The trail was planned in 2013 by Jan Dudeck using:
- Google Earth satellite images
- Hike trails and horseback trips previously donde by the author
- Hiking maps and guides books that document and describe trails in some selected areas
- Geotagged Panoramio images displayed on Google Earth
- Internet trail exchange platforms in particular: wikiexplora.com, wikiloc.com and trekkingchile.com
First Hike of the Trail
On November 12, 2013 I started with my girlfriend Meylin Ubilla in Coñaripe at the alternative starting point of section 11. We both had no previous long distance hiking experience and never used a packraft before.
During the hike we had a few moments of doubt because the route disappeared several times in impenetrable forest. But we always managed to find passable trail even if it meant returning a day’s hike. After about half the trail I became a bit concerned that we may run out of time before reaching our goal. But we kept going with steady pace without worrying too much.
On February 23, 2014 we finally arrived again in Coñaripe were we set out a 104 days before. Our GPS indicated roughly 1'600 km hiked and 50'000 m climbed. We actually walked on 80 days with the remaining time used to resupply, rest and to travel from the end of section 16 to the start of section 1.
The now published trail eliminates the seek detours and can be hiked by any experienced hiker with sufficient endurance and the proper equipment.
Trail Name


While hiking the trail I have long thought how to name this trail. I was looking for a precise but well descriptive name.
The trail crosses various regions that are rather unknown outside of Chile and Argentina. Few people have ever heard about Maule or Bio-Bio and might associate whatever with these words but not an outstanding trekking region. Therefore naming the trail after the actual regions seamed not a good choice.
On the other side naming the trail after the Andes like "Andes Trail" would be a huge exaggeration because the trail spans only a smaller part of this 7000 km long mountain range.
Naming the trail after Patagonia like "Patagonian Trail" would be incorrect, because most of the trail is actually not located in Patagonia at least when applying the traditional limits of this region. Most of the trail is on the Chilean side where only the regions Aysén and Magallanes further south are traditionally considered part of Patagonia. See the map: "Traditional limits of Patagonia".
To be precise and well descriptive at the same time I decided to use the geographic term "Greater Patagonia" that includes Patagonia in its traditional limits and the surrounding area like "Greater London" includes the city of London and the surroundings. On the Argentine side Patagonia reaches much further north than on the Chilean side and has it's limit at the Río Colorado with its spring near the Laguna del Maule. This is the latitude where section 1 ends and section 2 starts. So "Greater Patagonia" applies very well to the entire trail region because all parts of the route are located not more then 100 km outside of the traditional limits of Patagonia.
The name "Greater Patagonian Trail" seams a good choise because:
- with more than 1300 km length it’s a greater trail than all other published trails in Patagonia,
- the trail is without doubt one of greater trails in respect of beauty and diversity,
- the trail is located completely within "Greater Patagonia",
- the name remains correct while the trail gets extended further south and
- the name embraces the legend of Patagonia and may become a legend itself.
Publishing of the Trail
The trail was first published in 2014 on wikiexplora after completing the long distance hike. Also more than one thousend images were geotagged and uploaded to Panoramio for display on Google Earth with a reference to this wikiexplora trail description. The tracks are also uploaded to Wikiloc.
The trail was published without any commercial interests. The motives for publishing were:
- Share this trail with other interested hikers to promote this first long distance trail in South America and the Andes
- Attract contributors that perfect and extent this trail
- Promote hiking in the rather unknown parts of the trail to create an additional source of income for the humble people still living along the trail
- Protect and maintain this trail by making it well-known and more frequently used
Before publishing the trail I have long considered if publishing may have also negative consequences for the affected area. I personally do not see that this trail will become overun like in example "Torres del Paine". The trail is simply too long and demanding to attract large crowds. And even if a larger number of hikers seeks this challange they will be distribute over a rather long trail. The principle risk of publishing this trail is that this attracts irresponsible people that litter and don't have the necessary care when making camp fires. This may indeed cause severe damage and destruction. To promote a responsible behaviour I plead that all hikers respect the Code of Conduct of the trail.
On the other side I have seen plenty of evidence that settlers give up and retreat from this gorgeous but challenging highlands. But if the settlers that created these trails vacate their land then the trails will soon be overgrown, become invisible and destroyed by weather without being repaired and maintained. So by creating an addition source of income for these tough herdsmen and mountain farmers they will have one more reason to stay. And if they stay the trail will be maintained and remain accessible for hikers like you and me.
Future Development of the Trail
This trail is not finished yet. There is plenty of terrain left till this trail finally reaches the southern tip of Patagonia and ends either on the shores of the Magellan street or even on Tierra del Fuego. Also a few smaller sections need to verified and recorded and additional alternatives may be aggregated. Read the chapter Trail Verifications, Additional Options and Extensions to see how you can contribute to perfect and extent the Greater Patagonian Trail.
Comment to KML/KMZ File for Hiking
The KMZ file contains the geographic information of the trail and can be opened in Google Earth and uplodaded to most current GPS devices. See the wikipedia article for further information to this file format.
The KMZ file displayed on the satellite map above is optimized to provide a good overview but does not include waypoints and detailed information for hiking. Therefore the KMZ file below should be downloaded and used if you actually plan to hike a section or the entire Greater Patagonian Trail.
Greater Patagonian Trail with waypoints, options and alternatives: GPT01-18.kmz
The file is organized in folders and subfolders for a better overview in particular when viewing and organizing the trail on a computer. There is one folder for each section and each section contains a subfolder for waypoints and a subfolder for tracks.
Waypoints
The waypoints are named with the item of interest at the waypoint. A alphanumeric code is added in brackets to be able to refer in the trail description to specific waypoints. The GPS normally displays the entire waypoint name with the code.
Example waypoint name: Start (GPT01-WP001)
- Start: Item of interest, in this case the start of section 1
- (GPT01-WP001): Alphanumeric code in brackets
- GPT: Greater Patagonian Trail
- 01: Section 1
- -WP: Waypoint
- 001: Running number
Used waypoint categories are:
| Item | Comment | Example Images |
|---|---|---|
| Border | Point where the trail crosses the actual border between Chile and Argentina. The border control is typically in a different location. The offical trail of section 10 trespasses briefly through Argentine territory. This seams to be tollerated. | Marked Border, Unmarked Border |
| Border Control | Location where the police performs the exit and entry control. If you plan to cross the border you need to actively seek the police at the border control. You will not be given an entry step without getting the exit stamp first. | Chilean Border Control, Argentine Border Control |
| Bridge | Pedestrian or vehicle bridge. May be in poor state. | Bridge, Bridge, Bridge, Bridge |
| Bus Stop | Marked or unmarked bus stop. In most places buses will stop at any location if you clearly signal the driver that want to take a ride. Ask locals for the bus frequency and times. | Bus Stop |
| Cable Car River Crossing | At larger rivers that cannot be crossed by food cable cars are ocasionally installed. Ask the locals how to operate them to cross the river. | Cable Car River Crossing |
| Camp | Location suitable for camping. If not stated otherwise the camp site can be used free of charge and water and fire wood is available nearby. Pay camp sites are marked with an "$". To camp sites without water or wood "w/o water" or "w/o wood" is added. In areas with plenty of suitable locations only the most inviting paces are marked. | Camp, Camp, Camp, Camp |
| Carabineros | Chilean local police. To control remote border area small partly improvised police posts are setup and manned during the summer. Whenever you pass such a police post report to them and explain your plans. We were always treated very nicely. | Carabiñeros, Carabiñeros |
| CONAF | Corporación Nacional Forestal manned post. Conaf is the governing body of all natural areas protected by the state (national Parks, National Resersves and Natural Monuments, or SNASPE) in Chile, including those without forest or major vegetation. | CONAF park entrence |
| Diversion | Location where the trails splits or where attention is needed to no miss the correct trail. | Diversion |
| Ferry | Public ferry. | Ferry, Ferry, Ferry |
| Food | Location where you may get food or a meal. This may be a settlers home or a puesto. | Food, Food, Food |
| Gate | Gate that may be locked. We several times climbed over such gates. Leave the gate in the state you found if. If it the gate was open leave it open. If the gate was closed then close it again. | Closed Gate, Locked Gate, Locked Gate |
| Hot Spring | Geothermal hot spring. May be an unspoiled natural pool or a pool enclosed by a contruction. Hot springs that charge an entrance fee are marked with an "$". | Natural Hot Spring, Natural Hot Spring, Enclosed Hot Spring, Enclosed Hot Spring |
| Hotel | There are not many hotels along the trail so if you get there it's rare opportunity to pamper yourself. | Hotel |
| Lake | Fresh water lake. | Lake, Lake |
| Lodging | Accommodation of any type that is not a hotel. May be a simple room in a private house with a family (hospedaje familiar) or a bungalow (cabaña). | Lodging, Lodging |
| Mini Shop | Small shop or kiosk with a limited product range. If closed ask at the houses nearby for attention. | Mini Shop, Mini Shop |
| Pass | Mountain pass. The pass elevation is normally added. | Pass |
| Puesto | Improvised shelter or house in a remote area that is temporary used during the summer. If locked do not enter except in emergencies. If open you may use the shelter if needed with the appropriate respect. | Puesto, Puesto, Puesto, Puesto |
| Refuge | Shelter that is open for public use. | Refuge, Refuge |
| Restaurant | Restaurant. Expect a filling meal but not sophisticated cuisine. | Restaurant |
| River Crossing | River crossing without a bridge or a cable car. Water levels may change significant with snow melt, rain and daytime. If the river is feed by snowmelt water levels are normally lowest in the morning. Since rivers can change their bed look for the optimal spot where to cross and do not rely on the waypoint but your own judgment. River crossings are also locations where drinking water can be collected. | River Crossing on foot, River Crossing on foot, Easy River Crossing, River Crossing by horse |
| Sea | Access to the sea. | Sea |
| Settlement | Group of permanently inhabited houses. | Settlement |
| Settler | Single permanently inhabited house. Here you may ask for food or shelter in case of bad weather. | Settler, Settler |
| Shop | Shop with a wider product range. If closed ask at the houses nearby for attention. | Shop, Shop |
| Start | Starting point of a section. The start is at the finish of the previous section. Since this is not an official trail these starting points are not marked consistently and often not marked at all. | Start Signpost, Start in Town, Start at Bus Stop |
| Summit | Summit of a volcano along the trail that can be climbed on an optional side trip. | Summit, Summit |
| Trail Head | Location where a trail starts on a road. Attention is needed to no miss this trail. Some trail heads have a signpost, others not. | Trail Head |
| w/o Water | Camp or Puesto without drinking water nearby. If you plan to camp at such a location you should carry sufficient water for one night. | Puesto w/o Water |
| w/o Wood | Camp or Puesto without fire wood nearby. If you plan to camp at such a location you should either carry a camping stove or sufficient fire wood for one night. | Camp w/o Wood |
| Water | Location where you can get drinking water. The water may need to be filtered, boiled or chemically treated to be fit for drinking. | Water |
| $ | Camp or Hot Spring where you need to pay. | CONAF Camping |
| ? | Not verified waypoint. The unconfirmed waypoints are based on satellite images, maps or tales from locals. Whenever you can confirm or correct such a waypoint, you are welcome to send the waypoint with a comment to the author of this trail for update of the GPS File. | - |
Tracks
The track of each section is broken into smaller segments to differentiate between different trail types and to incorporate options and alternatives. Each section consists of up to 20 trail segments. Each track is name with a unique alphanumeric code.
Example track name: GPT01-TR006-RR-1
- GPT: Greater Patagonian Trail
- 01: Section 1
- -TR: Track
- 006: Running number
- -RR: Route type, in this example its the regular route for hiking and packrafting
- -1: Trail type, in this exmaple its a hiking trail or horse trail
Used route types are:
| Route Type | Code | Comment |
|---|---|---|
| Regular Route | RR | Regular route for hikers and packrafters. |
| Regular Hiking (Route) | RH | Regular hiking route that avoid the packraft water sections. If you do not carry a packraft take these tracks. |
| Regular Packraft (Route) | RP | Regular route for packrafters including the hiking parts to and from the water parts. If you do not carry a packraft do NOT take these tracks. |
| Optional Hiking (Route) | OH | Optional hiking route that returns to the regular route. The optional route may incorporate additional scenic areas or simply provide an alternative. |
| Optional Packraft (Route) | OP | Optional packraft route that requires a packraft in at least one part of the option. The optional route may incorporate additional scenic areas or simply provide an alternative or just a packraft fun trip on a lake near by. |
| Short Cut | SC | Alternative shorter track that leads back to the regular route but misses a scenic area on the regular route. |
| EXit (Route) | EX | Shorter or less demanding or less weather exposed hiking track that leaves the regular route to return to civilization. The end point of the exit route may be a village, a road with a bus stop or or a refuge where ground transport may be organised. |
| SUmmit (Route) | SU | Route that leads up to a summit of a near by mountain or volcano. The climb may be physically demanding but should not require special climbing gear. |
| InVestigation (Route) | IV | Trail investigation project that may result in an alternation of the regular route or addition of a new option to the Greater Patagonian Trail. To each investigation project the motive and the requirements will be outlined in the investigation project description and should be read before attempting the investigation. Such an investigation may seak an unconfirmed or not yet recorded trail that minimzes road usage or passes a particular scenic area. |
Used trail types are:
| Trail Type | Code | Comment | Example Images |
|---|---|---|---|
| Cross Country | 0 | Track that passes through open terrain without a visible trail. | Cross Country (volcano), Cross Country (forest), Cross Country (snow), Cross Country (steep), Cross Country (rocks without technical climbing), Cross Country |
| Hiking or Horse Trail | 1 | Mostly visible trail on any terrain. | Horse Trail, Hiking Trail, Trail, Trail, Trail |
| Minor Dirt Road | 2 | No or light traffic only. Can also be an abandoned road or a private road that is not open for public use. | Dirt Road with Light Traffic, Minor Public Dirt Road, Minor Non-Public Dirt Road, Minor Private Road, Unused Road, Abandoned Road |
| Mayor Dirt Road | 3 | Public dirt roads with transit traffic. | Mayor Dirt Road |
| Paved Road | 4 | Only few shorter segments at the start or finish of a sections. | Paved Road |
| Lake (Packraft) | L | Alternative options available if not carrying a packraft. | Lake |
| River (Packraft) | R | Alternative options available if not carrying a packraft. | River |
| Sea (Packraft) | S | Alternative options available if not carrying a packraft. | Sea |
| Ferry | F | Alternative ferry over lakes if not carrying a packraft. | Ferry, Ferry, Ferry |
| To be verified | ? | Trail type needs to be verified when hiked and recorded by GPS. Applies to route investigations only. | - |
Distances, Ascents, Descents and Walking Times


This trail description contains plenty of numbers for distances, altitudes, ascents, descents and even walking times. All these numbers are based on the "cleaned" GPS track without our occasional seek and search detours. Also all altitudes, ascents and descents are based on a digital map with a quite precise altitude profile.
These numbers are therefore also free of accumulated "GPS noise" and "barometric altimeter noise" that increase the measured distances, ascents and descents when recording the track by GPS while hiking. So, don't be surprised if your GPS will always indicate longer distances, more ascents and descents even if you stay on the trail. A deviation of 10% is typical.
The walking times provided here are estimated moving times without any breaks and rests. When evaluating our GPS records I was surprised that we did not move nearly one third of the time between leaving the camp in the morning and stopping again in the evening. It did not appear to us that we make such long breaks but the GPS record does not lie. So a walking time of 6 hours means more or less a 9 hour hiking day adding normal breaks for eating, taking pictures, verifying the route, chating with the locals on the trail or harvesting some piñones.
The estimated walking time is calculated purely based on distances, ascents and descents. I opted to use such a calculation because it removes the unnecessary seek and search detours and the factor of having a good day or a bad day. I developed and verified this calculation method based on all our GPS records and was surprised myself that such a simplified calculation provides quite reliable estimates. The calculated times correspond closely with our actual walking time. If applied to our actual GPS records the average deviation per day is 15 minutes and never more than 50 minutes.
The used calculation factors are:
- 12:30 minutes per km (corresponds with a 4.8 km/h walking speed on a level trail)
- Additional 12:00 minutes per 100 m ascent
- Additional 4:00 minutes per 100 m descent
These factors resulted in the smallest average deviation to our actual moving time recorded by GPS. I would not consider us as fast hikers, therefore the walking times calculated with these factors are rather conservative.
Profiles
The altitude profiles for each section were constructed keeping the same scale, as follows:
- Horizonatal axis: 1 km = 10 pixels
- Vertical axis: 1 km = 148.15 pixels, as a result of a constant range of 0 to 2700m in 400 pixels.
The profiles do not include side trips, and consider the use of a raft.
Trail Verifications, Additional Options and Extensions
Verifications
The KMZ File for Trekking above contains a few not verified tracks and waypoints because we did not hike all the options and alternatives. This unconfirmed tracks and waypoints are based on satellite images, maps or tales from locals and have a question mark “?” in the name. So you know on what tracks and waypoints you can rely on and where your explorer’s skills are needed. Tracks that need to be explored can also be recognized on unnatural straight lines over longer distances.
Whenever you walk such a not verified trail, you are welcome to record the trail by GPS and send the file with a comment to the author of this trail for update of the KMZ File.
Additional Options
If you know a better or simply an interesting alternative trail, that fits well into this Greater Patagonian Trail you are invited to be become co-author by sending your proposal with a GPS File to me. I will review it and incorporate it in the master file. This applies also to helpful new waypoints.
Extensions
This trail is not finished yet. There is plenty of terrain left till this trail finally reaches the southern tip of Patagonia and ends either on the shores of the Magellan street or even on Tierra del Fuego. So, if you hiked a section that extends this trail further south or that simply covers an area that is not included yet you are more than welcome to become a co-author by contributing your trail.
The trail should get you further south on a route that is worthwhile hiking. It should consist mainly of horse trails or minor dirt road with no or insignificant traffic. Walking i.e. long distances on the Careterra Austral seams not tempting to me. If I take the Careterra Austral, than I rather do it by bicycle.
The route should be passable without a machete, technical climbing or superman skills. Cross country through an open landscape is great, but it is not wanted to fight tree by tree through dense tempered rainforest.
It does not matter at all if the trail is on the Argentine side or the Chilean side as long as it does not depend on clandestine border crossings. If you get catched in particular by the Chilean carabineros without a valid stamp you may get expelled and this makes not a nice finish of such a trip.
Hikers and Contributors
To be issued.
Section Descriptions
The section descriptions below provide supplementary information to all sections of the Greater Patagonian Trail and will be issued in the following months.
An experienced hiker in explorers mood with good Spanish knowledge and planning skills will be able to hike the entire Greater Patagonian Trail without these detailed descriptions by fully exploiting the information provided in the detailed KMZ file for trekking.
Section 1: Volcán Descabezado

- Duration: 6 to 8 days
- Distance: 103 km
- Ascent: 4970 meters ↑
- Descent: 4870 meters ↓
- Option 1: Climb to the summit of the volcano Descabezado Grande
- Duration: 1 to 2 days
- Distance: 16 km
- Ascent: 2030 meters ↑
- Descent: 2030 meters ↓
- Option 2: Explore two hidden lakes
- Duration: ½ to 1 day
The first stage of the Greater Patagonian Trail gets you right into a mind-blowing volcanic theatre. The landscape is transformed by numerous powerful eruptions of the volcano Descabezado Grande and it’s equally potent smaller brothers in the surrounding. During the last major outbreak in 1932 the Quizapu; a parasitic crater 6 km south of the main crater; vomited an estimated 25 cubic kilometer of lava and volcanic ash.
After leaving the forest you will step through endless fields of pumice, climb three passes and cross a 4 km wide lava river. The struggle is rewarded with amazing outlooks, deep blue lakes and lagoons that suddenly pop in a surreal scenery and two thermal springs. Here you can soak up heat during a freezing night while admiring a sky full of stars. You can even cook your meal on one of the hot steam vents.
As an option your may climb to the 3900 m high summit of the “Great Decapitated”; this is what Descabezado Grande means. It’s a demanding long but technically uncomplicated ascent.
You can also explore two hidden lagoons; one that fills an ancient crater and a second one that was dammed up by another
smaller volcano. Both lakes are not far of the trail near a scenic camp site.
Here you can see plenty of images of section 1 of the Greater Patagonian Trail that are uplodaded to Panoramio and Google Earth.
And here you can read the detailed trail section description on wikiexplora: Section 1: Volcán Descabezado
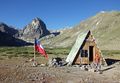
El Bolsón
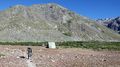
Leaving El Bolsón
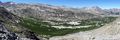
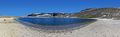
Laguna Las Ánimas

Pass 2560 m
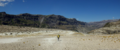
Approaching Laguna Mondaca
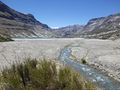
Laguna Mondaca

Bypasses Laguna Mondaca
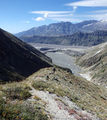
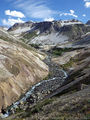
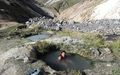
Termas de Azufre
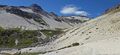
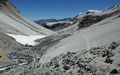
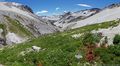
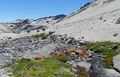
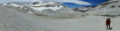
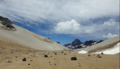
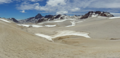
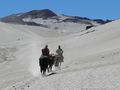
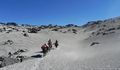
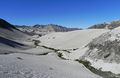
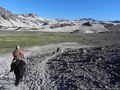
Leaving the Base Camp Descabezado Grande

Hot springs at Base Camp Descabezado Grande


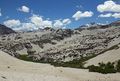
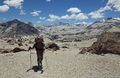
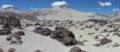
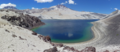
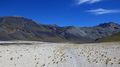
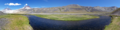
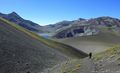
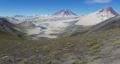
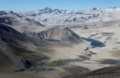
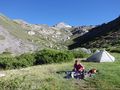
Camp near Laguna Los Hornitos

Laguna Los Hornitos
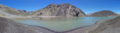
Laguna Los Hornitos
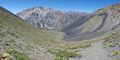
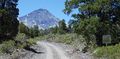
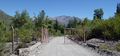


Section 2: Laguna Dial

- Duration: 7 to 10 days
- Distance: 144 km
- Ascent: 5390 meters ↑
- Descent: 5430 meters ↓
The second section of the Greater Patagonian Trail leads in four to five hiking days through the wide open valley Melado to the crystal clear Laguna Dial. This lake was formed by a volcanic eruption that plugged the upper valley and transformed this part of the river into a long lake.
With the melting snow in spring and early summer herdsmen migrate up the valley with their animals. Occasional lush green patches intermigle with vegetation that struggles with the try soil. But the now visible life and the accompanying river Melado make a refreshing change after having crossed the death beauty of volcanic ash and lava in the week before on section 1. Don’t miss the puesto of Señora Irma, where you can eat fresh goat cheese with bread that was recently baked in the hot ash of a fire.
After having passed the deep blue Laguna Dial you descent through the now tighter but equally scenic valleys of the rivers Rió Rodriguez and Los Sauces to the small settlement Pichi Rincon and a place called El Ingles. Here you can take a bus to the small town San Fabian to take a rest and to resupply.
Here you can see plenty of images of section 2 of the Greater Patagonian Trail that are uplodaded to Panoramio and Google Earth.
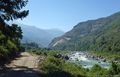
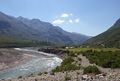
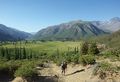
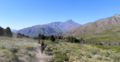
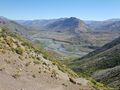
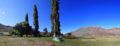
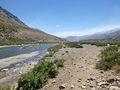
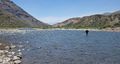
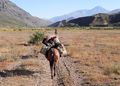
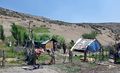
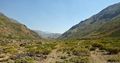
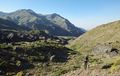
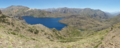
|Laguna Dial
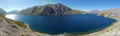
|Laguna Dial
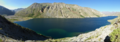
Laguna Dial
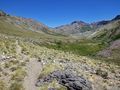
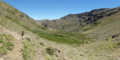
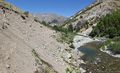
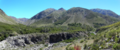
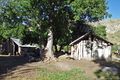
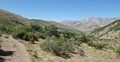
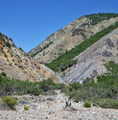
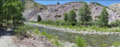
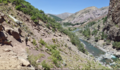
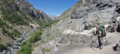
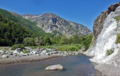
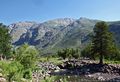


Section 2-3: Alternative Long Distance Challenge via Las Truchas

- Duration: 14 to 21 days
- Distance: 279 km
- Ascent: 12710 meters ↑
- Descent: 12100 meters ↓
If you are near the finish of section 2 and your backpack is still filled with plenty of food and you are ready for the ultimate endurance challenge, then you can leave the regular trail in the lower part of the valley Rodriguez and climb up the steep valley Las Tragedias: “the tragedies”. This optional trail section bypasses the settlement Pichi Rincon and the road to San Fabian via the scenic lake Las Truchas and the pristine river valley with the same name. Don't miss to take a dip in the refreshing water of the the lake or the Río Las Truchas or one of the contributary side streams! You will re-joins the regular trail in the small settlement El Roble without the possibility to resupply until the end of section 3 at the Laguna Las Lajas. There are few trail where you can walk such a long distance through a nearly untouched wilderness. If you combine section 2 and 3 with this alternative trail you will walk for 2 to 3 weeks without passing a village or a public road.
Here you can see plenty of images of section 2-3 of the Greater Patagonian Trail that are uplodaded to Panoramio and Google Earth.
Section 3: Volcán Chillán

- Duration: 7 to 10 days
- Distance: 129 km
- Ascent: 6420 meters ↑
- Descent: 5820 meters ↓
The third section of the Greater Patagonian Trail leads you first through the forest and patches along the rivers Río Los Sauces, Río Roble and Río Ñuble. Occasional farm houses show you till what point settlers have advanced but some abandoned buildings remind you that these settlers are retreating again. Making a living all year around in such a place is a challenge, that becomes invisible when passing on a charming summer day.
Eventually you will reach a first pass that opens your view to the volcano Chillan who has a notorious poor sleep. Lava streams and ash become your trail again. After having crossed the slope of the volcano you decent in the “Valle Termal” where you can taste the heat that constantly leaks out. Dive in the hot stream and relax in steaming water while watching the stars during a freezing night. The trail continues though untouched forest, goes up and down, crosses streams and get you once more to hot springs, but this time nicely enclosed and with a well build refuge next to it: the hot springs “Los Peucos”.
The final highlight of this trail section is the Laguna de Las Lajas that like the Laguna Dial was created by a volcano. The Laguna de Las Lajas is just one or two sizes bigger and was formed when the perfect cone shaped volcano Antuco had a series of powerful erruptions and plugged the drain of the valley. It is not possible to hike on the shore of the lake all the way to the section finish because steep rocky terrain blocks the path. So you need to climb the ridge on the western side of the lake. Depending on the weather and your explorers mood you can continue on the ridge to the trail section end, or take the “bad weather escape route” down into the valley Polcura on the other side of the ridge.
Here you can see plenty of images of section 3 of the Greater Patagonian Trail that are uplodaded to Panoramio and Google Earth.
Section 4: Volcán Antuco

- Duration: 3 to 5 days
- Distance: 57 km
- Ascent: 1380 meters ↑
- Descent: 1770 meters ↓
The fourth section of the Greater Patagonian Trail sets out on the base of volcano Antuco; a nearly perfect cone build with pitch black volcanic rocks and boulders. You can optionally climb this summit before continuing on the regular route. It’s a demanding long ascent over rather loose piles of sharp volcanic rocks that make the returning descent even more tiresome. But if the weather favours you, you get rewarded with an outlook that reaches north to the volcano Chillan and south to the volcano Copahue; a total distance that takes about 10 days to hike.
The regular trail takes the road to Argentine through vast fields of black volcanic ash in between the Laguna de Las Lajas and the volcano Antuco. On May 18, 2005 this road became the tragic scene of the worst peacetime military disaster in recent Chilean history. An overeager commander ordered about 400 poorly equipped conscripts to march this road despite a starting snow storm. 45 soldiers got disoriented and paralyze by the fierce snow storm and froze to death on the side of the road. Take it as an advise to always carry protective cloth and rather seek shelter if the weather turns against you. This trail is published for prudent hikers and not for wannabe heros.
After passing the ill-fated military post and the border control you need to leave the road before crossing into Argentina at the "Piedra del Indio" and turn south to enter the territory of the Pehuenche people. The "Piedra del Indio" or "Rock of the Indios" received its name because two "Indio" families where surprised by a similar fierce snow storm and were wiped out all together. A wide open valley leads you towards the first Araucaria trees that also mark the initial of the tribal land. Indigenous herdsman have set up their “Puestos” to look after their animals on the summer patches of grass. Centuries of disrespect, deceit and displacement by colonists have made this people withdrawn and sceptical compared to the settlers and “Puesteros” that you meet before. But if you approach them with respect and in a humble attitude you may get invited into their huts and listen to them speaking their native language Mapuche.
After crossing a saddle and descending into the Valley Queuco you finally reach the Pehuenche settlement Trapa Trapa. If you ask around and you are lucky you may stay for a night with one of the families.
Here you can see plenty of images of section 4 of the Greater Patagonian Trail that are uplodaded to Panoramio and Google Earth.
Section 5: Laguna El Barco

- Duration: 2 to 4 days
- Distance: 43 km
- Ascent: 1490 meters ↑
- Descent: 1500 meters ↓
Summary to be issued.
Here you can see plenty of images of section 5 of the Greater Patagonian Trail that are uplodaded to Panoramio and Google Earth.
Section 6: Guallali

- Duration: 3 to 4 days
- Distance: 50 km
- Ascent: 2530 meters ↑
- Descent: 2270 meters ↓
Summary to be issued.
Here you can see plenty of images of section 6 of the Greater Patagonian Trail that are uplodaded to Panoramio and Google Earth.
Section 7: Laguna Marinanqui

- Duration: 5 to 7 days
- Distance: 82 km
- Ascent: 2870 meters ↑
- Descent: 3030 meters ↓
Summary to be issued.
Here you can see plenty of images of section 7 of the Greater Patagonian Trail that are uplodaded to Panoramio and Google Earth.
Section 8: Laguna Icalma and Volcán Sollipulli

- Duration: 5 to 7 days
- Distance: 96 km
- Ascent: 2600 meters ↑
- Descent: 2800 meters ↓
Summary to be issued.
Here you can see plenty of images of section 8 of the Greater Patagonian Trail that are uplodaded to Panoramio and Google Earth.
Section 9: Curarrehue

- Duration: 3 to 5 days
- Distance: 70 km
- Ascent: 1860 meters ↑
- Descent: 1680 meters ↓
Summary to be issued.
Here you can see plenty of images of section 9 of the Greater Patagonian Trail that are uplodaded to Panoramio and Google Earth.
Section 10: Volcán Quetrupillan

- Duration: 3 to 5 days
- Distance: 59 km
- Ascent: 2080 meters ↑
- Descent: 2870 meters ↓
Summary to be issued.
Here you can see plenty of images of section 10 of the Greater Patagonian Trail that are uplodaded to Panoramio and Google Earth.
Section 11: Neltume

- Duration: 3 to 4 days
- Distance: 57 km
- Ascent: 950 meters ↑
- Descent: 570 meters ↓
Summary to be issued.
Here you can see plenty of images of section 11 of the Greater Patagonian Trail that are uplodaded to Panoramio and Google Earth.
Section 12: Lago Pirihueico

- Duration: 4 to 6 days
- Distance: 86 km
- Ascent: 2210 meters ↑
- Descent: 2720 meters ↓
Summary to be issued.
Here you can see plenty of images of section 12 of the Greater Patagonian Trail that are uplodaded to Panoramio and Google Earth.
Section 10-12: Alternative via Liquiñe
- Duration: x to x days
- Distance: x km
- Ascent: x meters ↑
- Descent: x meters ↓
Summary to be issued.
Section 13: Volcán Puyehue

- Duration: 4 to 6 days
- Distance: 70 km
- Ascent: 2980 meters ↑
- Descent: 2700 meters ↓
Summary to be issued.
Here you can see plenty of images of section 13 of the Greater Patagonian Trail that are uplodaded to Panoramio and Google Earth.
Section 14: Volcán Antillanca

- Duration: 3 to 4 days
- Distance: 39 km
- Ascent: 1800 meters ↑
- Descent: 2040 meters ↓
Summary to be issued.
Here you can see plenty of images of section 14 of the Greater Patagonian Trail that are uplodaded to Panoramio and Google Earth.
Section 15: Lago Todos Los Santos

- Duration: 4 to 6 days
- Distance: 83 km
- Ascent: 2100 meters ↑
- Descent: 2190 meters ↓
Summary to be issued.
Here you can see plenty of images of section 15 of the Greater Patagonian Trail that are uplodaded to Panoramio and Google Earth.
Section 16: Cochamó


- Duration: 7 to 10 days
- Distance: 145 km
- Ascent: 4850 meters ↑
- Descent: 4690 meters ↓
Summary to be issued.
Here you can see plenty of images of section 16 of the Greater Patagonian Trail that are uplodaded to Panoramio and Google Earth.
Other Trail in Chile
Revisa la lista completa de 554 rutas de trekking y las 344 rutas de montaña en Chile
|